Choose a location, gather materials, and follow safety guidelines for constructing a fire pit.
Building a DIY fire pit in your backyard is a great way to create a cozy and inviting outdoor space for gatherings. Here’s a step-by-step guide on how to build a simple fire pit:
Materials & Tools
- Concrete retaining wall blocks or fire bricks
- Sand or gravel
- Level
- Tape measure
- String
- Shovel
- Tamper
- Landscape adhesive
- Metal fire ring or fire pit insert
- Masonry adhesive
- Safety gear (gloves, safety glasses)

Preparation
1. Check Local Regulations
Before starting your project, check local regulations and obtain any necessary permits. Some areas may have restrictions on open flames.
2. Select a Location
Choose a safe and well-ventilated location away from overhanging trees, structures, and flammable materials. Ensure there are no utility lines beneath the chosen spot.
3. Outline the Fire Pit
Use a tape measure and string to outline the diameter of your fire pit. This will help you visualize the size and shape. Consider a diameter of around 36 to 48 inches for a comfortable seating area.
4. Excavate the Area
Dig a shallow pit within the outlined area, removing grass and soil. Aim for a depth of about 6 inches.
5. Level the Base
Use a level to ensure the excavated area is flat and level. Add or remove soil as needed to achieve an even base.
6. Add a Layer of Gravel or Sand
Place a layer of gravel or sand in the excavated area to improve drainage and create a stable base. Use a tamper to compact the material.
Application
1. Place the First Course of Blocks
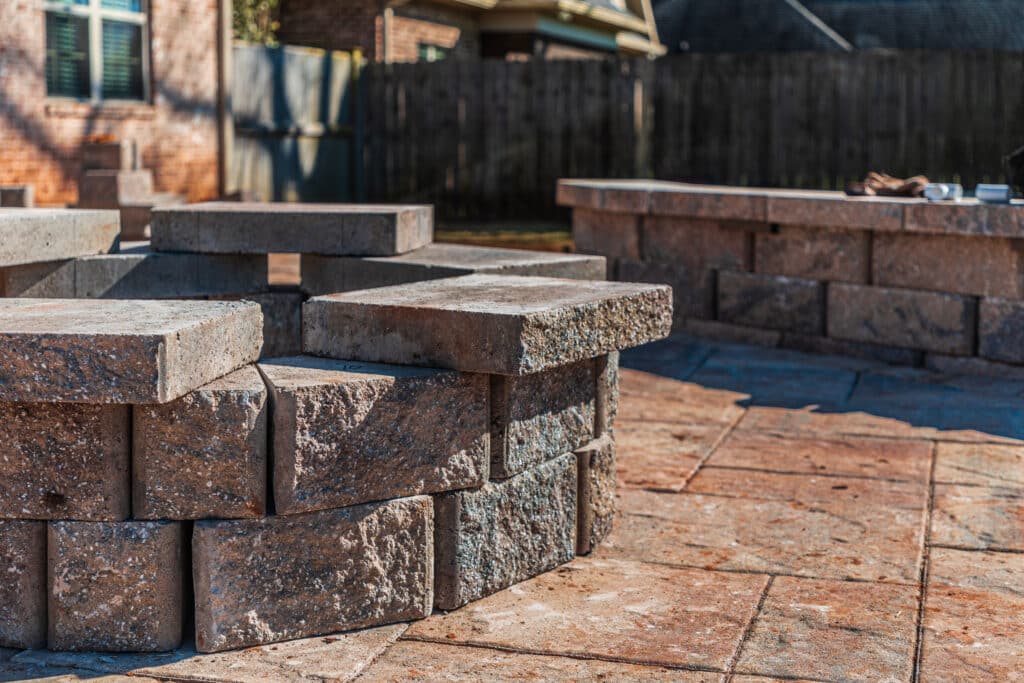
Begin placing the concrete retaining wall blocks or fire bricks around the perimeter of the excavated area. Arrange them in a circle, leaving a gap for the fire pit opening.
2. Check for Level
Use a level to ensure the first course of blocks is level. Adjust the blocks as needed, adding or removing sand or gravel beneath them.
9. Add Subsequent Courses
Continue stacking blocks to create additional courses, alternating the placement of the blocks to create a stable structure. Apply landscape adhesive between the blocks to secure them in place.
10. Insert the Fire Ring
Place the metal fire ring or fire pit insert inside the circle of blocks. Ensure it sits securely on the leveled base.
11. Secure the Fire Ring
Apply masonry adhesive around the top of the blocks to secure the fire ring in place. This will help hold the metal ring and provide additional stability.
12. Finish the Top Course
Complete the top course of blocks, ensuring they are level and securely attached with landscape adhesive.
13. Add a Decorative Cap
If desired, add a decorative cap to the top course of blocks for a finished look. Caps are available in various materials, including concrete or natural stone.
Finishing Tasks
14. Let It Cure
Allow the adhesive to cure according to the manufacturer’s instructions before using the fire pit.
15. Enjoy Your Fire Pit
Once the adhesive has cured, your DIY fire pit is ready to use. Add a layer of gravel or sand inside the pit, place some firewood, and enjoy the warmth of your backyard fire pit.
Remember to follow safety precautions, such as keeping a bucket of water or a hose nearby, and never leave the fire unattended. Additionally, be aware of local fire safety regulations and guidelines. Consider reaching out to Top Dog and their hardscaping services to get your fire pit project started.


